Hi lovelies,
How did your monday go? Today’s post is a battle of the silvers and I also have a question for you afterwards. Let’s get to it.
If you have read any of these before I suggest you skip everything and just go straight to the photo’s. If you’re new to the blog or haven’t seen these yet then I suggest you go take a look at Tuesday Stamping #1. I explain most of it there but will I also give a brief run down in this post. So if you’ve read it, scroll over the first bit of text 😉
Basically, this is how I am going to do it. I am going to be stamping over black and white. White will be the lightest colour you ever wear and black the darkest. What better way to see how a polish works over dark and light colours. Now, obviously, not many will actually want to stamp OVER black but it will be a good way to find out if a polish will show up over dark colours. If it shows up on black you can be pretty certain it will show up over everything. That does mean that if it is noticeable but not very, it will probably work much better over say a purple or a blue. I will try to address this with each polish I show you as well.
I will also be using the same plate for all the stamping to make sure there will be continuity. I chose a stamp that had some images with thin lines, with bigger spaces, with some detail etc. That way you can see if a polish will stamp crisp lines when they are thin or if it will smudge when the image has bigger spaces. I decided to go with Pueen11. I will be using the 4 full nail images on this plate.
I will show you 4 of my ordinary polishes with every post. If you want to see more or less per post please let me know. I will use 4 random polishes each time until I have worked through all the polishes I have (excluding glitters of course) and I will show you everything, whether it stamped well or not. I will also be showing you my first attempts at all of them. Sometimes it happens that you move the stamper a little bit when you stamp onto the nail. Or you waited just a second too long and the whole image doesn’t transfer. Or you press too hard and get the shadow stamping. Usually if this happens I would remove it and stamp again. It also happens that a polish looks so promising and after you’ve stamped you think, ah this could look better if I tried it once or twice more. I will not be doing any of that. What I stamp first try is what you get. I just feel that you can get a better result if you keep trying but the mark of a good stamping polish is how well it works straight off the bat.
***
Like I mentioned above, today is a bit of a battle of the silver polishes. I am also curious if you would like it if I did these posts with the same colours in future. In other words have 4 different pinks or reds or purples in each post. Or do you prefer if I kept it as 4 random polishes for each post? Let me know 🙂
Sally Hansen – Celeb city
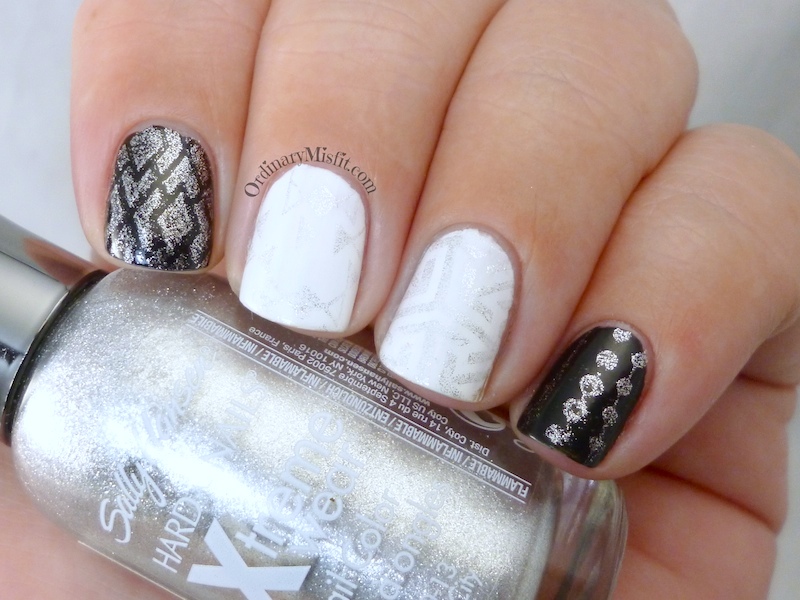 I am a little surprised by this one. I have seen a few people mention that they use this polish to stamp with but I did not get good results at all. I mean it stamps, it’s there and it’s visible to some extent but it isn’t very opaque or crisp. So you can see it shows up on the black quite well and you can see it on the white to some degree (it’s silver, which doesn’t really create a huge contrast with the white so it looks very washed out). It just seems a bit….all over the place. I can see it stamped but it looks more like abstract stamping than crisp and clear stamping. Anyway, this did not work well for me. I wouldn’t use this for stamping in future.
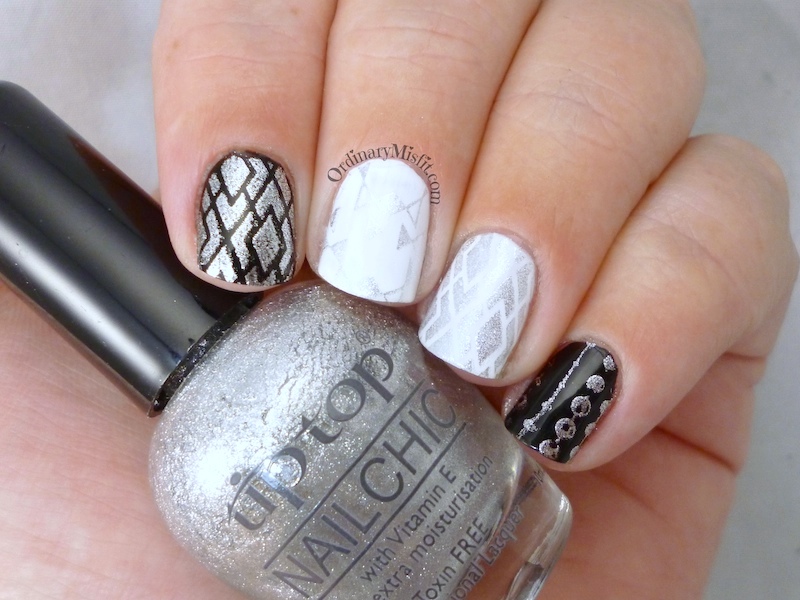
Tip Top – Armourplate
Armourplate is a foil just like Celeb city above. Here however, you can see the difference. Armourplate shows up really well on the black and the white (even though it isn’t very contrasting on the white) and it stamps really well with crisp, clear images. I made an oopsie by stamping the same image on my ring and index but I don’t think it hurt. You can still see what you need to see. This is definitely good for stamping.
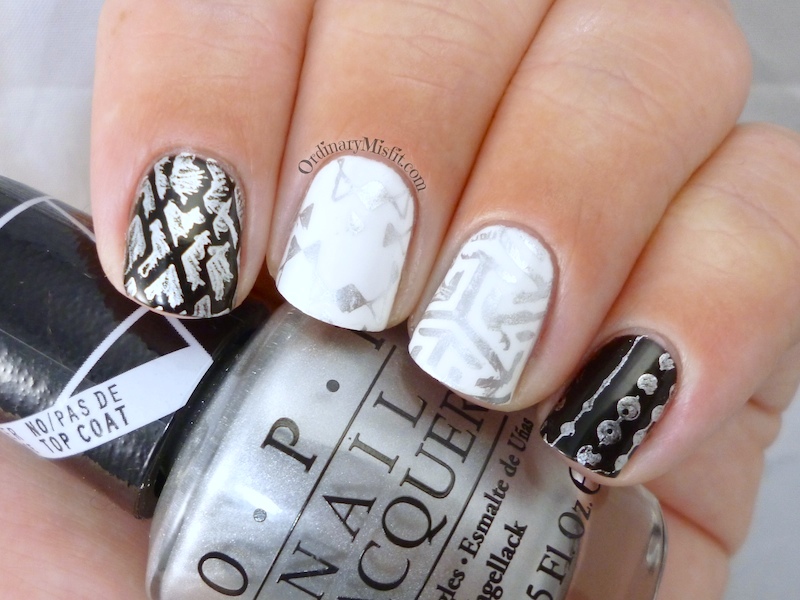
OPI – Push and shove
Good grief I struggled with this one. First of I have to say I have had success stamping with this one before. This time however I struggled. The first try my stamper wouldn’t pick up an image at all. I tried 3 times to apply polish, scrap and pick up and every time I got nothing on the stamper. Absolutely nothing. Not even a smudge or a partial image, nothing. So I changed stampers and it managed to pick up. On my index was probably the worst. It looks like I squiggled some lines with a pen. It faired better on images that are thinner lines like my middle and pinky but not so well on the thicker lines like index and ring. It does show up well on the black and the white though. If you really want to stamp with this I would suggest you try. It seems to be very temperamentel and iffy. Here is an image of where I had used it before – a guest post you can find here
As you can see the stamp consisted of very thin lines so I suspect that is why I had success with it.
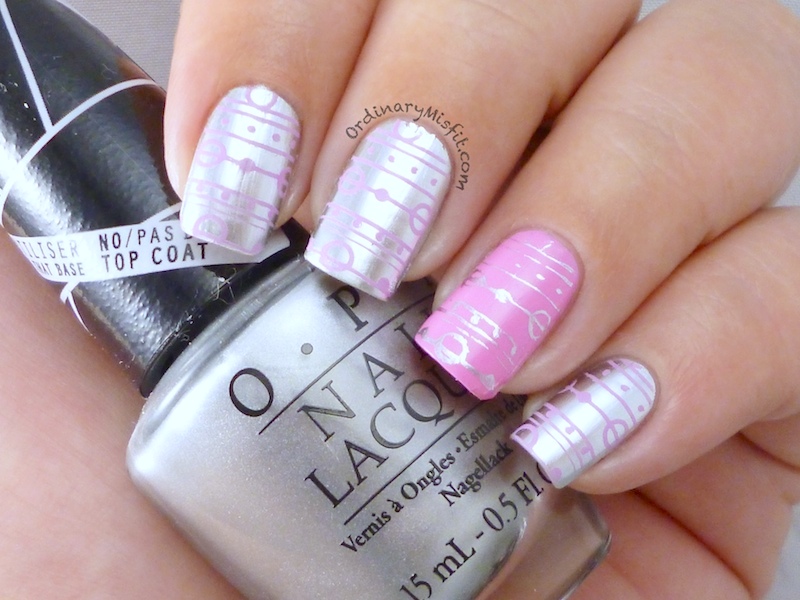
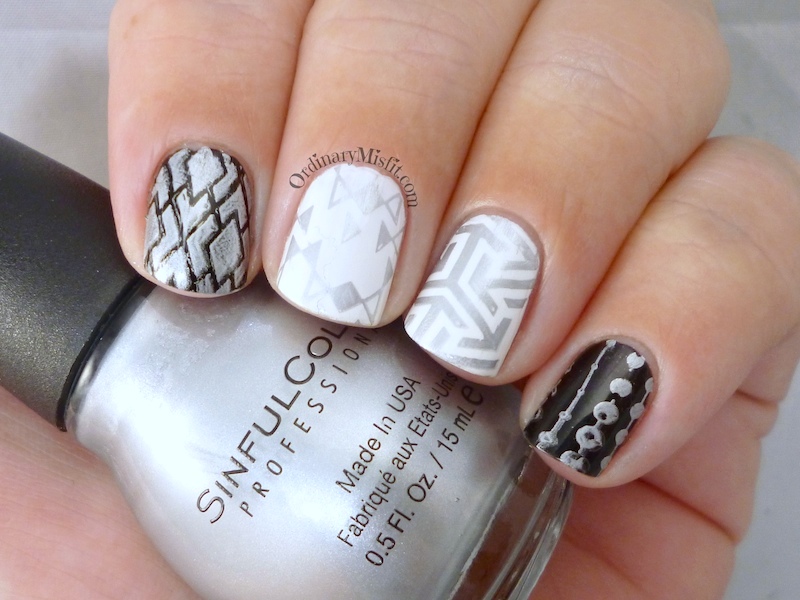
Sinful Colors – Casablanca
I managed to smudge my index finger like a pro here. It accidentally slipped while I was stamping so that is all me. This one shows up really well on the white and the black and also stamps really well. Nice crisp images all round. Casablanca is a chrome – ish polish and considering how much easier this was to use I might not struggle with Push and Shove and use this instead. It is not as reflective chrome as Push and shove but it is still distinctly silver. I really like this one.
Have you tried any of these? Did you have success with one that I didn’t? Let me know your experiences if you have any. And don’t forget to let me know if you would like these to be colour coded posts (using the same colour per post) or leave as it.
Thanks for reading,



I usually use Armourplate for silver stamping but Casablanca looks great too, I don’t have that one though. I like having the 4 silvers together but I always liked the random colours too so just do it which ever way you feel like 🙂
Thanks so much for the feedback Kerry. I have decided (obviously) to do the colours together and throw in some random colours every now and then 🙂
Armourplate works beautifully! These posts are so helpful 😀
Squeaky Q recently posted…OMD Challenge Day 21 – Animal Print
Thanks so much. I’m so glad someone is finding them helpful. They are helpful to me 🙂
I would love to see colours bunched together please!
You KNOW i’m going to request a red post right?
Thanks Megan! And you’re welcome 😛
I quite enjoyed the colour code here. It is like your best silver stampers and a failed one
Thanks V, Yes I kinda like bunching colours together for that very same reason.
Colour coded please 🙂
Thanks Renita. Done. I will throw in a random coloured post in here and there. 🙂