I mentioned the other day that I got a lovely package from Tip Top Nails with products to review. Included in the package was some of the new trend edition polishes. The one I am telling you about today is the Sprinkle Beads in the colour Reggae to Riches.
The Sprinkle Beads come in a duo bottle with polish on the one side and the beads on the other side. Reggae to Riches is a gold polish with gold sprinkle beads.
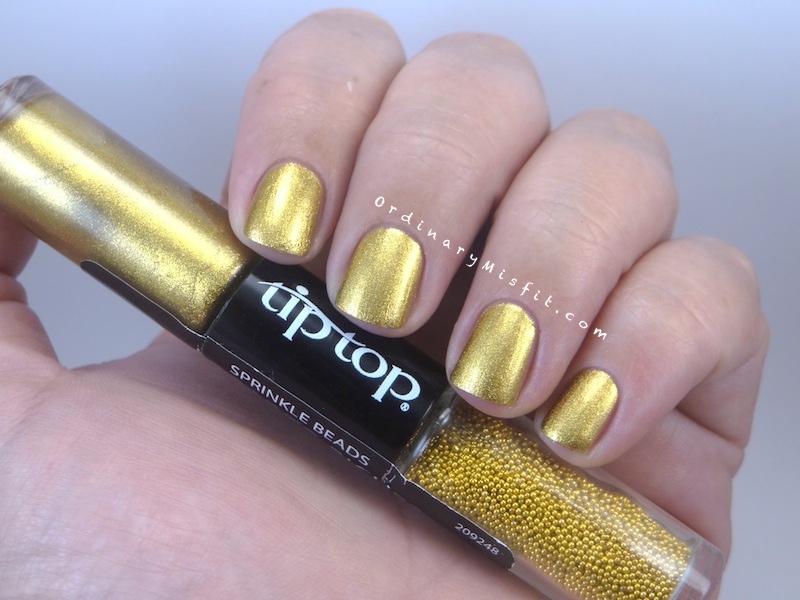
Sprinkle Beads are also known as Caviar beads or glass beads. I am not the biggest fan. I love the look of it but it isn’t something you can wear for very long. You will see in my photos that I don’t always get every single piece of my nail covered either. I know this is just skill level on my part. I like having some sprinkle beads around for that special occasion look or even just to try something different. I actually think it is quite versatile because you can do quite a few looks with it. So back to Reggae to Riches. The polish in this set is yellow gold, almost foil like polish. This is what it looks like on its own.
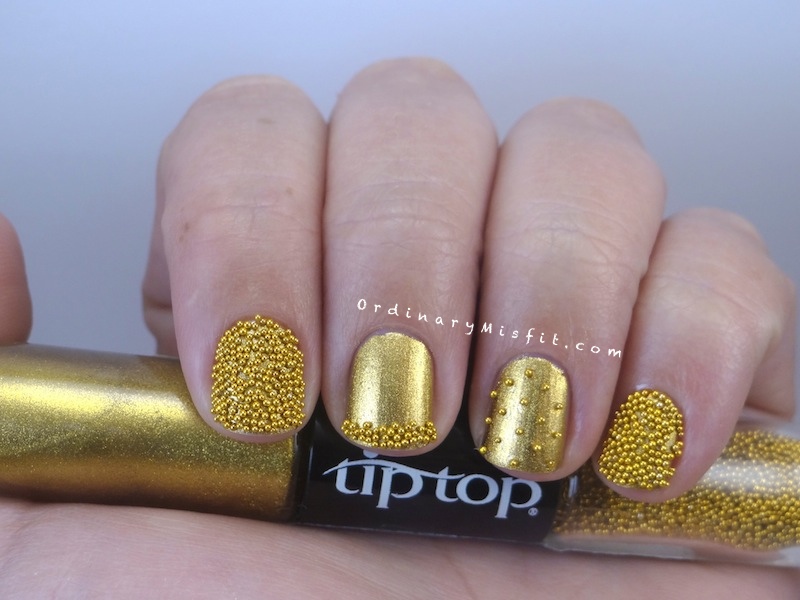
I am not a great fan of this shade of gold polish but I actually quite like this. It is quite striking! This is two coats. I decided to let this let these two coats dry completely before going ahead with the sprinkle beads. I used pretty much the same technique I used when I used the Wasabi Whisper Wild Thing Glitter when applying the beads, but I used a clear, non-fancy top coat. This is what I ended up with.
As you can see I tried a few different things. My baby finger and pointer finger are the same. I started off with a clean piece of paper folded in half and left open. I then used a clear, non fancy top coat (I will explain why in a bit) and added a nice thick coat on top of the colour. I didn’t do one finger at a time because a) I was using a top coat that doesn’t dry fast and b) I was only doing two fingers. If the case was different for you I would suggest doing one finger at a time. Then I took the sprinkle beads part and liberally sprinkled it over the wet clear polish. I did all of this over that piece of paper. This means the paper catches all the excess beads and because it was folded it is much easier to put the excess back into the bottle. Once my whole nail is covered I lightly pressed down to make sure all the beads sunk into the clear polish. Then I lightly tap off the excess onto the paper.
For my middle finger I was trying to do a french tip but because my nails are so short I struggled a bit with this one. I used some tape to mark off the tip. Then I added the clear polish and immediately took off the tape. Then I sprinkled the beads onto the tip as I did with my pointer and baby finger. I think with a little bit more length this would’ve worked – and looked – much better.
My ring finger was actually the most fun. I sprinkled a few of the beads onto the paper. Then, using a blob of the same clear polish on another surface, I used my dotting tool to dot a small amount of the clear polish on my nail and then pick up a bead and place it on top. I used this pattern but you could use any pattern including putting them in straight lines.
Now, You can leave your beads as is. They are not going to stay on for very long but they will look gorgeous and make a statement. If you are going to use a top coat it will make the beads stay on a little bit longer. Just be very careful with what topcoat you use. I mentioned above that you need to use a ‘non-fancy’ topcoat. The reason for this is because some quick drying topcoats or topcoats with some special ‘feature’ might rub the colour off the beads. You can easily test this on a single bead separately before you add anything to your nails. You will see in the next few pictures that I used the Tip Top Toughen Up Maxi Growth topcoat and it turned the beads a little silver-ish. (As a sidenote, I actually like the change and already have ideas about doing it on purpose so if you like it too you can try it out)
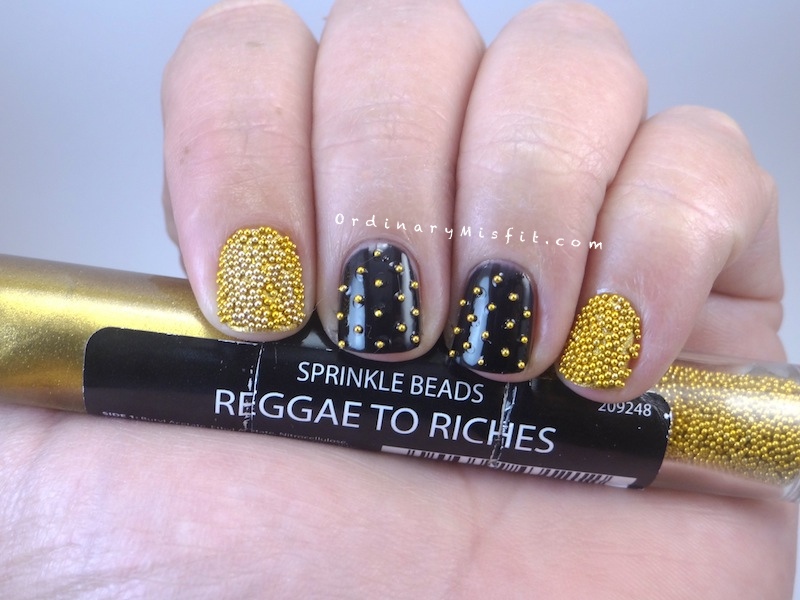
Remember I mentioned how versatile I think these beads can be? This is another ‘look’ I tried out using the Tip Top Sprinkle Beads in Reggae to Riches.
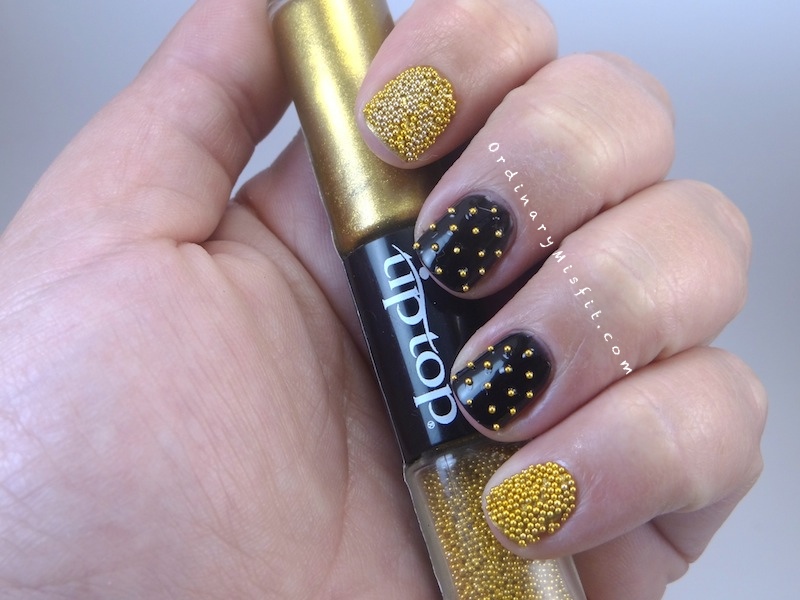
I used the same technique as I did above and all I changed was the base colour. Here I used two coats of Tip Top – Black Forest. You can see here that on my pointer finger the colour of the beads have changed a little bit. I added the top coat to that finger. I can also tell you those beads stayed put for ages. Adding a topcoat really helps with staying power.
What do you think of these sprinkle beads? Don’t you think it is great that you can get a completely different look just by changing your base colour? You can get these Tip Top Sprinkle beads in a variety of colours from Clicks stores for R69.99. Let me know what you think!
Thanks for reading!


Ohhhhh I love the black and gold mani!
I really love what you did on your ring finger and the second look. Not crazy about the whole nail being covered or the french, but have seen a gradient that I rather liked 🙂
acidicice recently posted…New Nail Polish Haul
Thank you so much. Yes the gradient is actually very nice as well. I like that. I must say the one finger that I added top coat to, the beads stuck on for a while. It was a rub to remove them so I think with a top coat it might last longer than expected.
This is so pretty. Do they have it in blue, white or red? I want to do a post on 4th of July nails?
Imka recently posted…Ten Random Facts About Me
Looks very interesting. I don’t know if I would have the patience or skill for this. I live my nail-life vicariously through your blog!
Charlene recently posted…Smashbox Paint Pen Eye Liner
Aww you are too sweet. Thank you so much Charlene. I am happy to help 😛
It’s actually very quick and easy.
1. I love cavi manis.
2. I loooooove this gold on YOU!
3. My fav look is the beads on the black. That’s unique and looks damn good. You did a damn good job with that!
Thanks so much V!!!! So glad you liked it. I think it shows you can do more than just the ‘intended’ look with these duo packs.
<3
I’m not the biggest fan of gold but the second look looks awesome on you! I love the black against the gold! Just gives it that extra pop!
Aww thanks T!!! I think the black with the gold is nice too. Something different.
Wow, your nails almost look like the tops of cupcakes! Excellent 3D addition.
Thank you so much for the compliment Petra! Thanks for reading! xx