Hi lovelies,
I have been so excited for this post and I am thrilled to be able to share it with you today. I absolutely love it and V has outdone herself once again. Let me hand over to For the Love of Nail Art…..
I love doing guest posts for people. To me they’re fun because I get to wreck someone else’s blog for a change 😉
I was very honored when Michelle asked me to be the first of the lot in her monthly blogger feature.
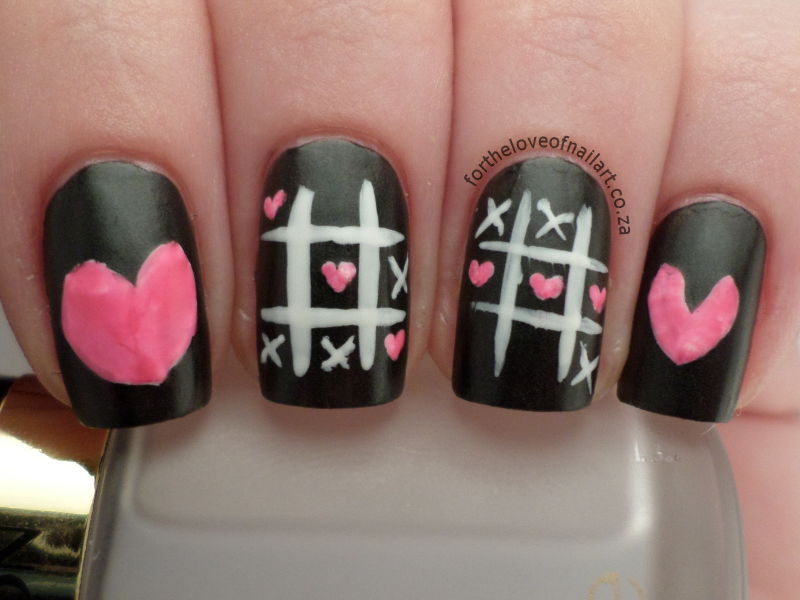
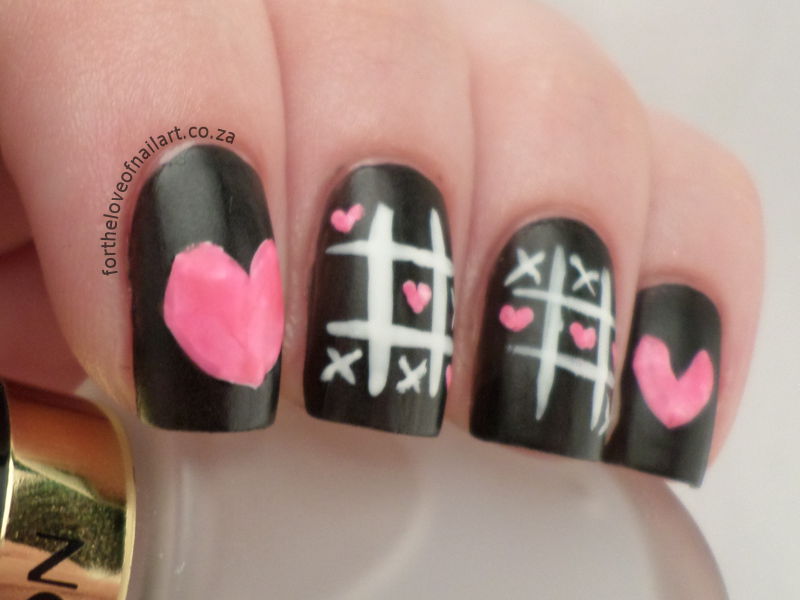
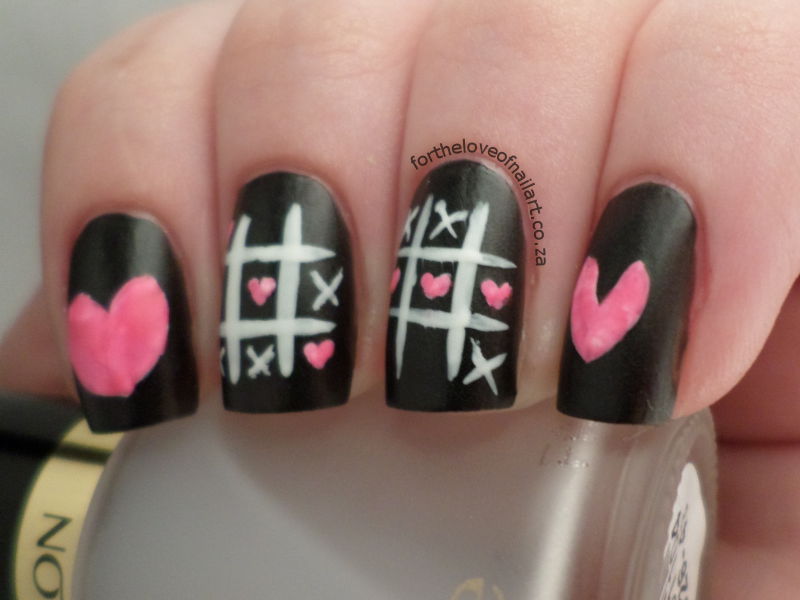
I decided to do cute Valentine’s themed nails for her and the picture I found on Pinterest reminded me of her so that’s why I wanted to do it (how funny would it be if she’s done something similar for her blog and we both chose the same design LOL).
Credit to Finger Food for her amazing art which can be found HERE And is the inspiration behind my mani.


I also did a tutorial for you 😀
Wana see? If not, oh well you’re kind of stuck with it!

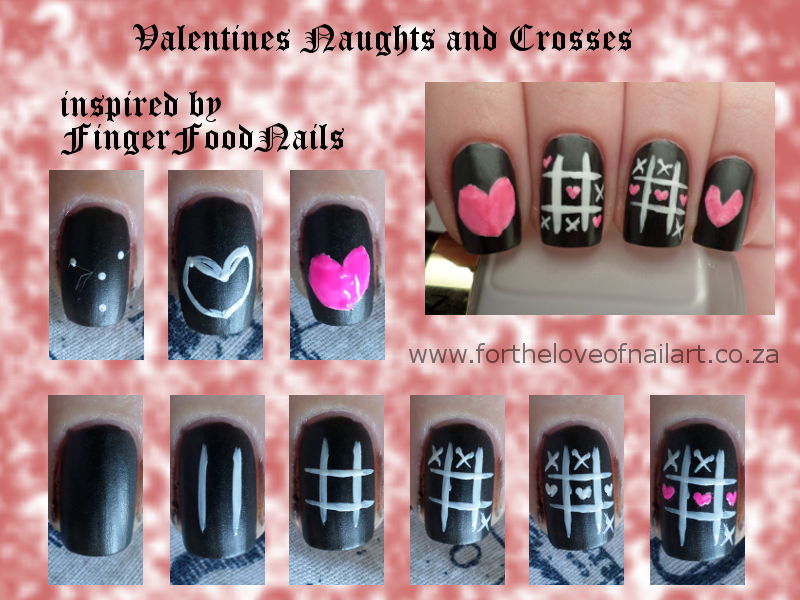
Pictures follow from left to right:
- Wipe your nails down with acetone to remove all excess oils and prevent your polish from peeling.
- Base coat time.
- Two coats of a black polish/OPI – 4 in the morning. Leave to dry.
- For the hearts: using a dotting tool and white polish/Sinful Colors – Snow me White make a Y shape.
- Connect your dots and once you’ve done that, you can curve the top portion of the heart. The heart on my index I made curvier whereas the heart on pinky I made skinnier by making my middle dot of the Y lower down. The choice is yours.
- Colour in your heart with white polish and then to make it POP, go over it carefully with a pink polish/Tip Top – Sitting Pretty.
- For the checkerboard of Hearts and Crosses: using a white striping polish/striping brush and white polish make two vertical lines down your nails
- Then make another two horizonal lines to cross the first set.
- Make three cross on your board wherever you like, as long as they don’t make a set of three. If you see here that your board lines are too short, you can extend them now.
- Make three hearts by doing small, thick V shapes. Then you colour those hearts in very carefully because they’re so small with pink polish (I used a small dotting tool to colour them in).
- Finish your whole design off with any matte top coat/Revlon – Matte top coat.
It seems complicated but it isn’t really. I actually had a harder time with the hearts than I did the checkerboard… I don’t know why.
Is it something you’d try out this Valentine’s day???
To finish off:
M hope you like it and thanks for letting me wreck your blog for a day 😀
***
Thank you so much V, I absolutely LOVE it! I am definitely going to give this a try!
Don;t forget you can find V here:
Thanks for reading,


These are so pretty!
Candice | Beauty Candy Loves
♥♥♥
I agree! Thanks Candice!
Reminds me of something (nudge nudge wink wink)
Juanita recently posted…Double Stamping
Hahahahaha *nudge wink back*
Do a better job on the hearts k!?
Thank you for posting this on Wednesday and for featuring me… Yet again!
Siobhan recently posted…Avon Nailwear Pro – Chilling Teal, Starry Sky and Cosmic Trip
Hah! Not sure I can do better than you!
Hehehe you’re welcome! Thanks so much for being part of it!
This is so cute!!
My nieces (10 and 8, who are visiting at the moment) already requested a manicure like this 🙂
Joyce recently posted…Zoya Delight Spring 2015 – Lillian
Awww that is so cute!!! I wish I had nieces!
adorable !
Craftynail recently posted…Love Story by Incoco
So agree! She nailed it! 😉
I love the naughts and crosses nails!
Painted Fingertips recently posted…Water Marble Wednesday: Freehand Lettering
Me too! 🙂
These are great! I can see why V said they reminded her of you!
They are indeed great! And thanks, I also think they are super me! Talented lady that V!!